 Save to Pinterest
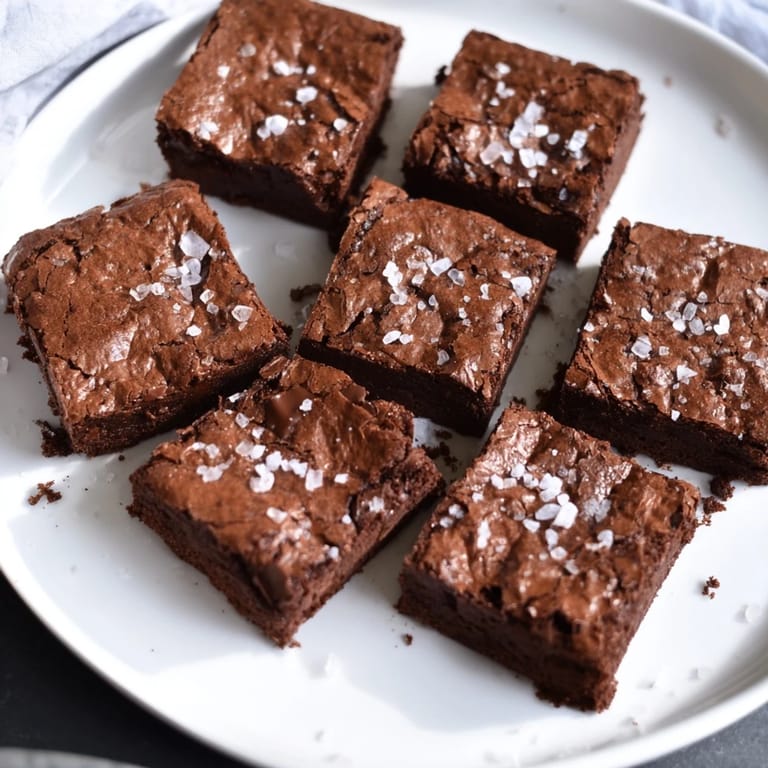
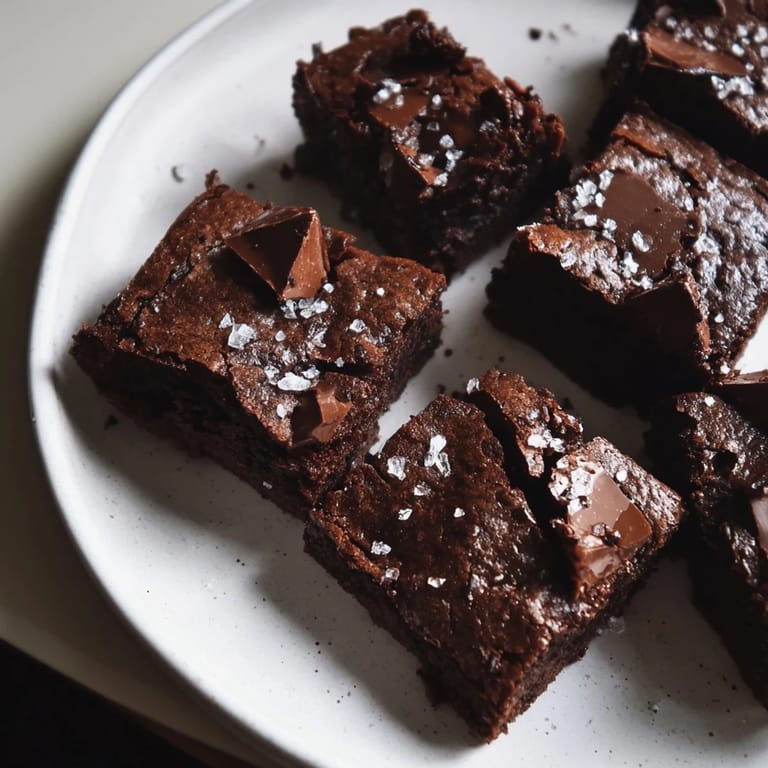
 I was craving something deeply chocolatey one rainy afternoon, and all I had was a bar of dark chocolate I'd been saving. No box mix, no plan. I melted it with butter, stirred in what I had on hand, and those brownies turned out better than anything I'd ever baked from a package. The flaky salt on top was a last-minute idea, and it completely changed everything.
I brought a batch to a potluck once, still warm in the pan, and watched people go quiet after the first bite. Someone asked if I went to pastry school. I hadn't, I just learned to use good chocolate and not overthink it. That night I wrote the recipe down on a napkin so I wouldn't forget the proportions.
Ingredients
- High-quality dark chocolate (70% cocoa): This is the soul of the brownie, so use something you'd actually enjoy eating on its own. Cheap chocolate tastes waxy once baked.
- Unsalted butter: Melts into the chocolate to create that glossy, fudgy texture. I always use unsalted so I can control the salt level myself.
- Granulated sugar: Sweetens and helps build structure. It also gives the brownies that shiny, crackly top if you whisk it well with the eggs.
- Light brown sugar: Adds a hint of molasses depth and keeps the brownies soft and chewy instead of cakey.
- Eggs (room temperature): They need to be room temp so they blend smoothly into the warm chocolate without seizing. I leave mine on the counter while I prep.
- Pure vanilla extract: Deepens the chocolate flavor. The real stuff matters here, imitation vanilla tastes flat next to dark chocolate.
- All-purpose flour: Just enough to hold everything together without making them cakey. I measure by weight when I can.
- Unsweetened cocoa powder: Boosts the chocolate intensity. I sift it to avoid lumps in the batter.
- Fine sea salt: Mixed into the batter to balance sweetness and make the chocolate flavor pop.
- Flaky sea salt: Sprinkled on top before baking. This is the magic touch, those little salty crystals against warm chocolate.
Tired of Takeout? 🥡
Get 10 meals you can make faster than delivery arrives. Seriously.
One email. No spam. Unsubscribe anytime.
Instructions
- Prep the pan and preheat:
- Line your square pan with parchment, letting it hang over the sides like handles. This makes lifting the brownies out so much easier later. Heat the oven to 180°C (350°F) so it's ready when you are.
- Melt chocolate and butter:
- Set a heatproof bowl over simmering water and stir the chopped chocolate and butter until they melt into something glossy and smooth. Pull it off the heat and let it cool for a few minutes so it doesn't scramble the eggs.
- Whisk sugar and eggs:
- Beat the granulated sugar, brown sugar, eggs, and vanilla together in a big bowl until the mixture goes pale and thick, about 2 to 3 minutes. Your arm will get a little tired, but this step builds that crackly top.
- Combine chocolate and egg mixtures:
- Pour the melted chocolate into the egg bowl and whisk until everything is one smooth, dark, glossy batter. It smells incredible at this point.
- Fold in dry ingredients:
- Sift the flour, cocoa powder, and fine salt right into the bowl, then fold gently with a spatula. Stop as soon as you don't see dry streaks, overmixing makes them tough instead of fudgy.
- Pour and salt:
- Scrape the batter into the prepared pan and smooth the top. Sprinkle the flaky salt evenly over the surface, it'll sink in just a little as it bakes.
- Bake:
- Slide the pan into the oven for 28 to 32 minutes. You want a toothpick to come out with a few moist crumbs, not wet batter, not clean.
- Cool completely:
- Let the brownies cool in the pan on a wire rack. I know it's hard to wait, but they set up as they cool and slice much cleaner.
 Save to Pinterest
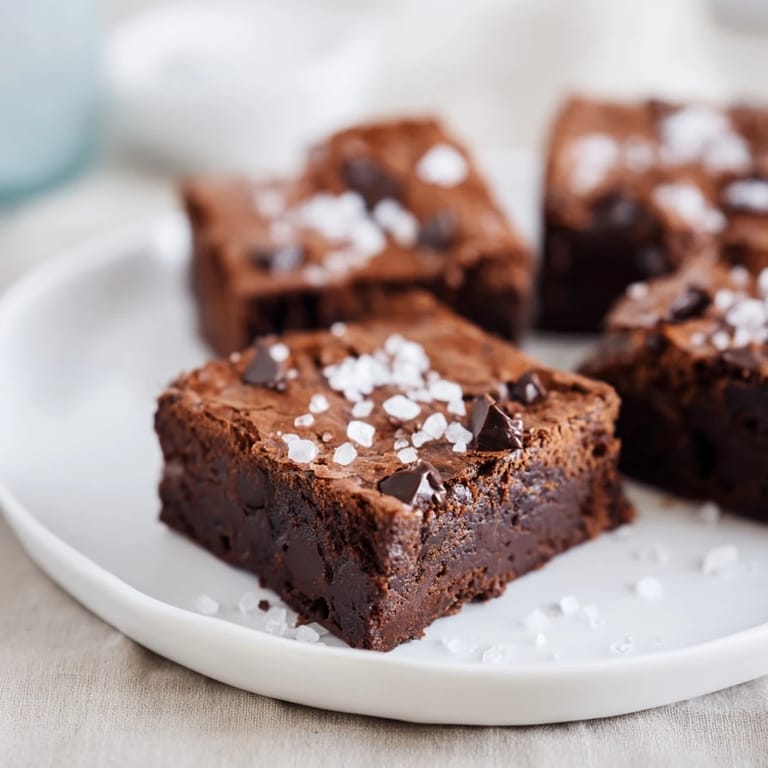
 One winter evening I made these for myself, no occasion, just because. I ate one warm from the pan with a cup of coffee and realized I didn't need a reason to bake something I loved. That became my new tradition, brownies on quiet nights when I needed something comforting and mine.
How to Know When Theyre Done
The edges will look set and pull away slightly from the pan, and the center will still have a faint jiggle when you shake it. A toothpick stuck in the middle should come out with a few sticky crumbs clinging to it, not wet batter. If it comes out clean, you've gone too far. I set a timer for 28 minutes and check from there, every oven runs a little different.
Storing and Serving
I keep them in an airtight container at room temperature for up to four days, though they rarely last that long. If you want them warm again, a few seconds in the microwave brings back that just-baked softness. Some people love them cold from the fridge, dense and fudgy like chocolate bars. I've served them with vanilla ice cream, with whipped cream, and plain on a plate, they're perfect every way.
Make Them Your Own
Once you've made these a couple times, you'll start seeing where you can play. I've folded in toasted walnuts for crunch, stirred in dark chocolate chips for extra pockets of melty chocolate, even swapped the vanilla for a little espresso powder to deepen the flavor. One friend uses a gluten-free flour blend and says they turn out just as fudgy. The recipe is forgiving as long as you don't overbake.
- Try adding a swirl of peanut butter or tahini on top before baking.
- Sprinkle crushed freeze-dried raspberries with the salt for a tart pop.
- Use a mix of dark and milk chocolate if you want them a little sweeter.
 Save to Pinterest
 These brownies taught me that simple ingredients, handled with a little care, can turn into something people remember. I hope they become one of your favorites too.
Recipe FAQs
- → How do I melt dark chocolate and butter together?
Use a double boiler by placing a heatproof bowl over simmering water, stirring gently until smooth to avoid burning.
- → Why add flaky sea salt on top?
Flaky sea salt adds a delicate crunch and enhances the sweetness by providing a savory contrast.
- → Can I use gluten-free flour instead?
Yes, substituting with a gluten-free blend works well without altering texture significantly.
- → What causes brownies to be fudgy rather than cakey?
Using more butter and chocolate with minimal flour along with careful mixing ensures a dense, moist texture.
- → How to check doneness when baking?
Insert a toothpick into the center; a few moist crumbs sticking are ideal, avoiding a fully clean stick.