Save to Pinterest
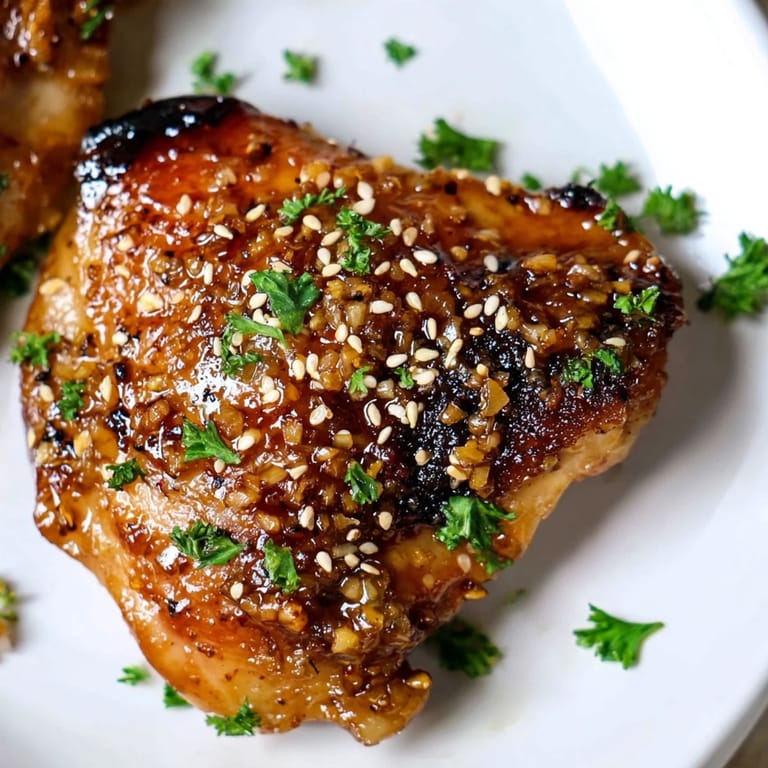
 The skillet was still smoking when I realized I'd forgotten to open the honey jar lid all the way. Sticky fingers, a hot pan, and garlic already browning too fast. That night taught me more about timing than any recipe ever could. Now, this honey garlic glazed chicken is the dish I make when I want something that looks impressive but forgives my chaos. It's become my weeknight anchor, the kind of meal that smells so good my neighbors text me.
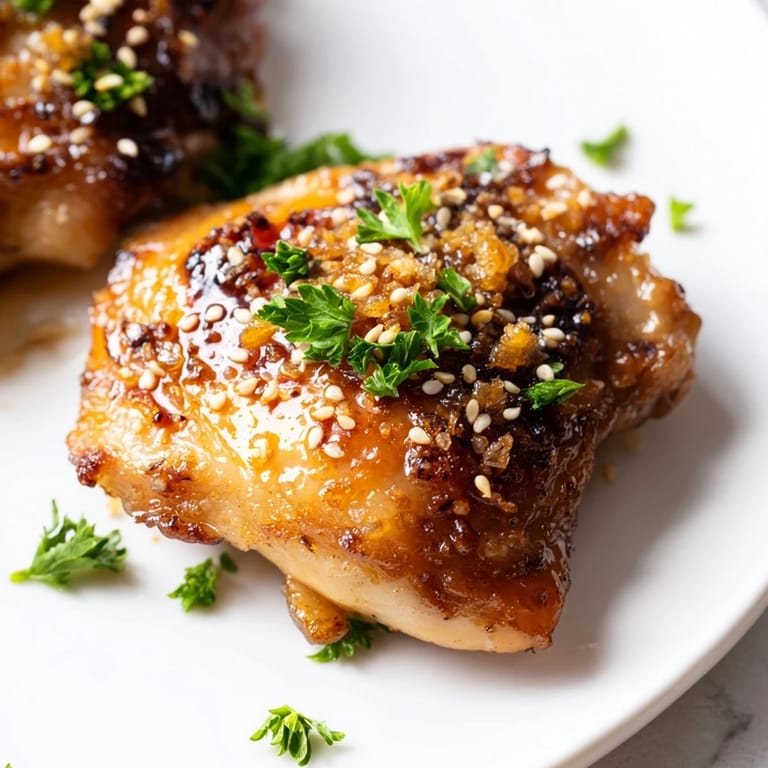
I made this for a friend who swore she hated dark meat chicken. She ate three thighs and scraped the pan with her fork. The crispy, sticky skin won her over before she even noticed what cut it was. That night, I learned that texture and flavor can change someone's mind faster than any argument. It's the recipe I pull out when I need to prove a point without saying a word.
Ingredients
- Bone-in, skin-on chicken thighs: The skin crisps up into a sweet, savory shell, and the bone keeps everything moist and flavorful even if you overbake by a few minutes.
- Salt and black pepper: Simple seasoning that lets the glaze shine without competing, just enough to wake up the chicken before it meets the honey.
- Honey: This is your glaze backbone, providing both sweetness and that glossy, sticky coating that clings to every bite.
- Soy sauce: Low sodium is key here so you control the saltiness, and it adds that deep umami punch that balances the honey perfectly.
- Garlic: Fresh minced garlic blooms in the hot oil and perfumes the whole dish, don't even think about using the jarred stuff.
- Rice vinegar or apple cider vinegar: A splash of acid cuts through the sweetness and keeps the glaze from feeling heavy or one-note.
- Water: Thins the glaze just enough so it coats instead of clumps, and helps it spread evenly across the chicken.
- Olive oil: For searing the skin until it's golden and releasing all those crispy, flavorful bits that make the glaze even better.
- Crushed red pepper flakes: Optional heat that sneaks up on you, adding a gentle warmth that makes you take another bite.
- Fresh parsley or green onions: A pop of color and freshness that balances the richness right before serving.
- Toasted sesame seeds: A final nutty crunch that makes the dish feel special, even on a Tuesday.
Tired of Takeout? 🥡
Get 10 meals you can make faster than delivery arrives. Seriously.
One email. No spam. Unsubscribe anytime.
Instructions
- Preheat Your Oven:
- Set it to 400°F so it's ready when your chicken hits the skillet. This high heat will crisp the skin and caramelize the glaze into something magical.
- Prep and Season the Chicken:
- Pat those thighs completely dry with paper towels, moisture is the enemy of crispy skin. Season both sides with salt and pepper, keeping it simple so the glaze can do the talking.
- Sear the Chicken:
- Heat olive oil in your oven-safe skillet over medium-high until it shimmers, then lay the thighs skin side down and resist the urge to move them. Let them sear for 3 to 4 minutes until deep golden brown, flip for 2 more minutes, then set aside.
- Build the Glaze:
- In the same skillet, toss in the minced garlic and let it sizzle for just 30 seconds until it smells like heaven. Stir in honey, soy sauce, vinegar, water, and red pepper flakes if you're using them, then bring it all to a bubbling simmer.
- Nestle and Coat:
- Return the chicken thighs to the skillet skin side up, then spoon that glossy glaze all over them. This is where the magic starts, so don't be shy with the basting.
- Bake and Baste:
- Slide the skillet into the oven and bake for 18 to 22 minutes, pulling it out halfway to baste again with more glaze. The skin will turn dark and shiny, and the edges will caramelize into sweet, sticky perfection.
- Rest and Garnish:
- Let the chicken rest for 5 minutes so the juices settle back into the meat. Sprinkle with parsley or green onions and sesame seeds, then serve while it's still glistening.
 Save to Pinterest
 One night, I served this over a pile of steamed rice and watched the glaze soak in, turning every grain sticky and sweet. My partner ate in silence, which is how I know something's really good. When he finally looked up, he just said, again tomorrow. That's when I knew this wasn't just dinner, it was a weeknight tradition in the making.
Make It Your Own
Boneless thighs or breasts work if you prefer, just cut the baking time by 5 to 7 minutes and watch closely so they don't dry out. I've also swapped in tamari when cooking for gluten-free friends, and no one ever notices the difference. If you want extra crunch, hit the chicken with the broiler for 2 to 3 minutes at the end, but stay close because that glaze can go from caramelized to charred in a blink.
Serving Suggestions
This chicken begs for steamed jasmine rice to soak up every drop of glaze, and a quick stir-fry of snap peas or broccoli on the side keeps things balanced. I've served it over cauliflower rice for a lighter meal, and it still feels indulgent. Sometimes I'll toss in a handful of roasted cashews at the end for extra crunch and richness.
Storage and Reheating
Leftovers keep in the fridge for up to three days, and the glaze thickens as it cools, clinging even tighter to the chicken. Reheat gently in a skillet over medium heat with a splash of water to loosen the glaze, or pop it in the oven at 350°F until warmed through. I've eaten this cold straight from the fridge more times than I'll admit, and it's still delicious.
- Store in an airtight container to keep the skin from getting soggy.
- Freeze individual portions for up to two months, thaw overnight before reheating.
- Drizzle a little extra honey or soy sauce when reheating if the glaze has been absorbed too much.
 Save to Pinterest
 This honey garlic glazed chicken has become my answer to hectic evenings and surprise guests alike. It's proof that simple ingredients and a hot skillet can create something worth remembering.
Recipe FAQs
- → Can I use chicken breasts instead of thighs?
Yes, boneless chicken breasts work well. Reduce the baking time by 5-7 minutes since they cook faster than thighs. Pound them to even thickness for consistent cooking.
- → How do I get the crispiest skin?
Ensure the chicken is completely dry before searing. Pat with paper towels and sear skin-side down first until golden. For extra crispiness, broil for 2-3 minutes at the end of baking, watching carefully to avoid burning.
- → What can I substitute for soy sauce?
Use tamari for a gluten-free option, or try coconut aminos for a lighter alternative. Adjust salt levels accordingly as substitutes vary in saltiness.
- → Can I make this dairy-free?
This dish is naturally dairy-free as written. Just verify your soy sauce is certified dairy-free if you have allergies, as some brands may have trace amounts.
- → How do I reheat leftovers without drying them out?
Reheat gently in a 325°F oven covered with foil for 10-12 minutes, or reheat in a skillet over low heat with a splash of water to restore moisture.
- → Can I prepare the glaze ahead of time?
Yes, mix the glaze ingredients up to 24 hours in advance and store in an airtight container in the refrigerator. Bring to room temperature before using.