 Save to Pinterest
 The shock of teal food coloring splashing onto my apron made me grin as I started prepping this graduation cake last spring. That moment set the tone—anything could happen in the kitchen when bold colors and edible gold are involved. Mixing up the butter and sugar, I remember the satisfying hiss from the stand mixer and how the vanilla scent filled the room, promising sweetness ahead. What began as a blank canvas became a jewel of edible art, and the anticipation in the air felt contagious. It’s a recipe that delivers both drama and delight with every slice.
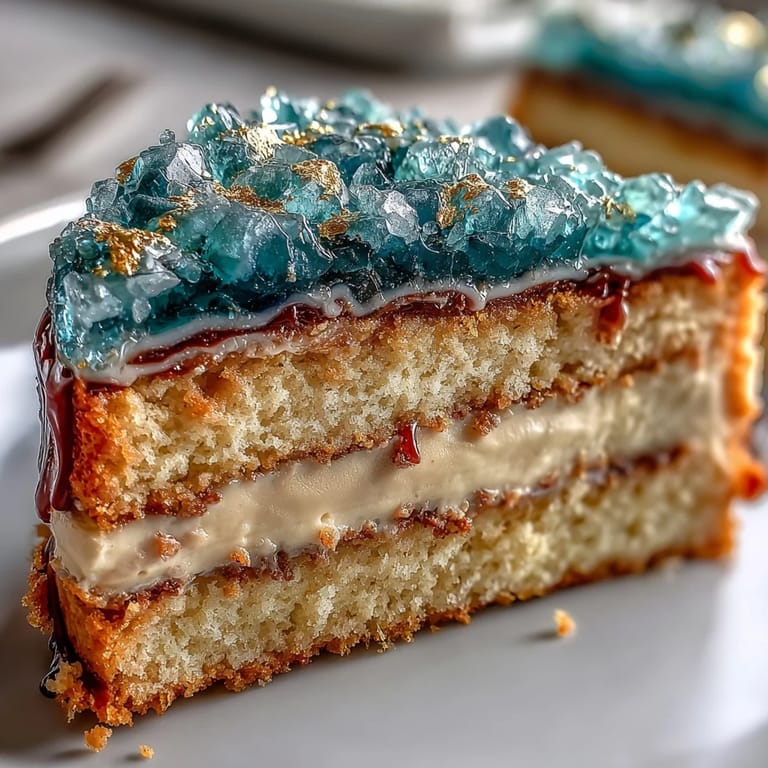
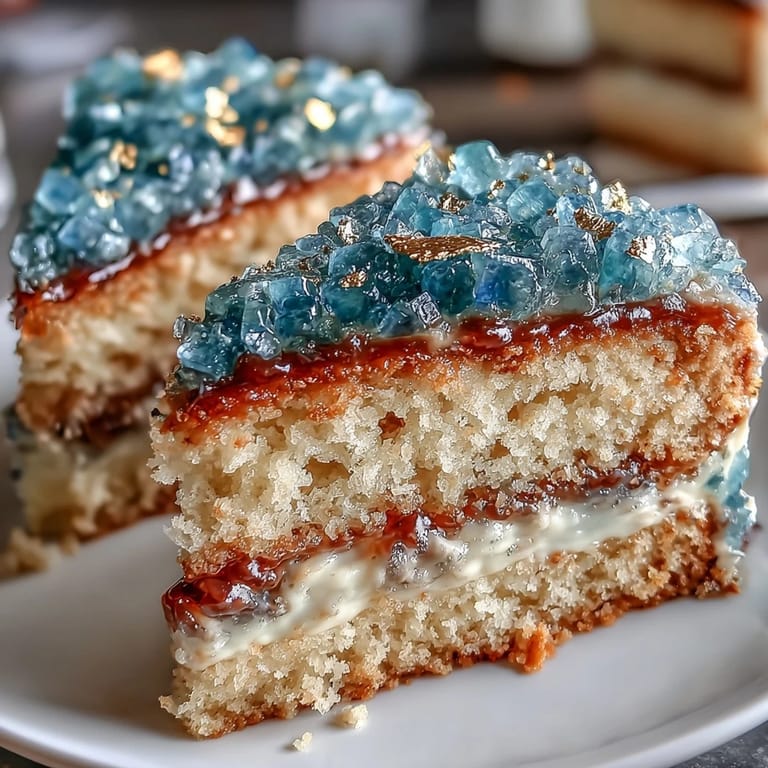
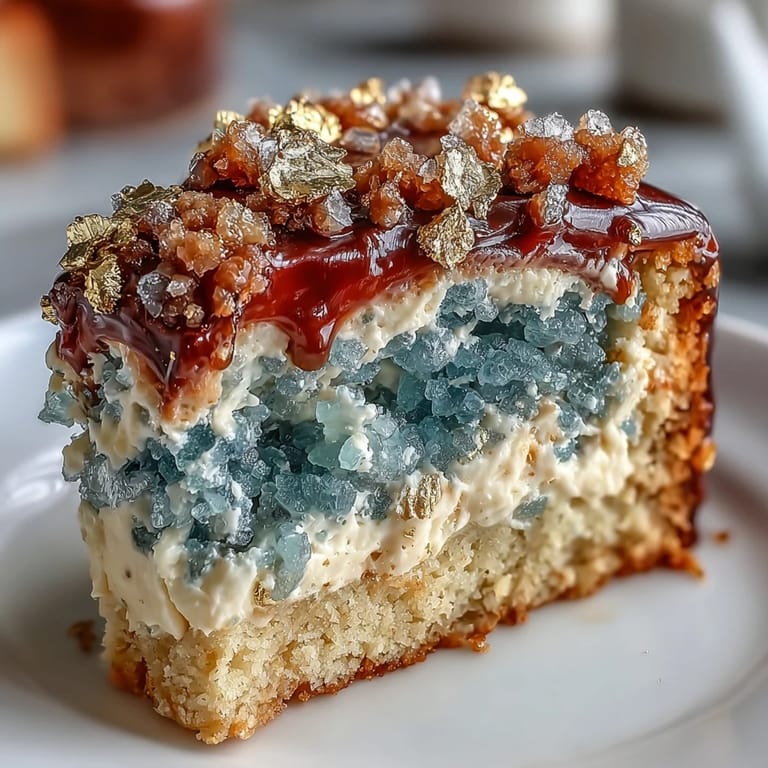
I once brought this cake to a graduation party and heard laughter as someone wondered if it was too beautiful to eat. That night, the golden accents shimmered under the patio lights, and guests eagerly snapped photos before diving in. Slicing through the geode felt almost ceremonial—revealing the brilliant teal sugar crystals was as thrilling as revealing a real gemstone. Every bite became part of the memory: sugary crunch and velvety cake, all wrapped up in the excitement of achievement. It’s a cake that turns the milestone into something magical and edible.
Ingredients
- All-purpose flour: Sifting flour with baking powder and salt ensures a light, airy crumb; measure accurately for best texture.
- Unsalted butter: Room-temperature butter is key, blending smoothly to anchor both cake and buttercream.
- Granulated sugar: Creaming sugar with butter gives structure and sweetness—don’t rush this step.
- Large eggs: Whisked in one at a time to create richness and lift; room temperature helps them integrate seamlessly.
- Vanilla extract: Adds warmth to the cake; try a touch of almond or lemon for a twist if desired.
- Whole milk: Alternated into the batter helps keep everything moist and decadent.
- Powdered sugar: Sifted to avoid lumps in your buttercream; it’s the secret to silky frosting.
- Teal gel food coloring: Highly concentrated, so a little goes a long way—mix gently for vibrant shade without over-blending.
- Rock sugar crystals: Paints a geode effect—use clear or white, and color carefully for realistic dimension.
- Edible gold leaf or gold luster dust: Just a touch turns your cake from lovely to show-stopping; patience is needed here so gold sticks perfectly.
- Simple syrup: Brush on cake layers if you want extra moistness, especially for parties where cakes sit out.
Tired of Takeout? 🥡
Get 10 meals you can make faster than delivery arrives. Seriously.
One email. No spam. Unsubscribe anytime.
Instructions
- Bake Your Vanilla Cake
- Preheat your oven and line cake pans while envisioning the final masterpiece. Watch the batter rise and inhale the buttery aroma as it envelops the kitchen, signaling readiness after golden crusts form.
- Whip Up Buttercream
- Beat the butter until the mixer’s hum is steady, then slowly sift in powdered sugar as clouds rise. Blend in vanilla, cream, and teal coloring until your frosting gleams with color—lively and rich.
- Color Sugar Crystals
- Tumble rock sugar in a bowl and add teal food coloring drop by drop, coaxing vibrant hues without turning everything sticky. Lay them flat on parchment to dry, resisting the urge to touch—they sparkle best undisturbed.
- Stack and Frost
- Level the cakes and brush with syrup if you like, then layer with buttercream, catching crumbs as you go. Smooth teal buttercream across the stack, letting swirls and ridges celebrate imperfections.
- Carve the Geode Slice
- Use a sharp knife to carve a dramatic wedge, revealing the interior and making space for crystals. Smear a thin layer of buttercream and nestle sugar crystals in, arranging lighter bits toward the center for natural effect.
- Add Gold Accents
- Paint the geode edge with gold leaf or luster dust to frame the crystals; a food-safe brush and a steady hand turn the slice into a treasure. Stand back and admire the metallic sheen swirling with teal—pure celebration.
- Finishing Touches
- Dot lightly with extra gold and place a graduation topper if you like. Bask in the admiring silence before slicing into your edible masterpiece.
 Save to Pinterest
 In a quiet moment after clean-up, I realized the cake was more than just dessert—it was a centerpiece that made everyone feel celebrated. Seeing people gather, smile, and claim a slice transformed the recipe into a shared experience worth repeating.
Getting That Geode Look Just Right
The key to a realistic geode is deliberate placement of sugar crystals—start with pale ones in the center and deepen color toward the edges, just like natural stone. I once tried tossing them all in and ended up with a sugar avalanche, so now I use tweezers for precision. Working slowly lets each crystal catch the light. If you’re feeling bold, mix in extra blue or even a hint of purple to make the geode pop. Experimenting makes every cake unique.
Making Buttercream That Stands Tall
Buttercream can be tricky on warm days, so I sometimes chill my mixing bowl ahead to help it hold shape. If your frosting gets too soft, a quick stint in the fridge works wonders. Sifting powdered sugar is a minor extra step, but your patience pays off with velvety results. I learned the hard way not to overmix once food coloring goes in—it dulls the shine and leaves streaks. Texture and color are the heart of the finish, so trust your senses.
Last-Minute Tips Before Serving
Let the finished cake sit in the fridge for at least 30 minutes to set those gold accents. If slicing for a crowd, use a warmed, clean knife for picture-perfect pieces—just dip and wipe between cuts. Keep leftover crystals in a jar for future celebrations—they never lose their sparkle.
- Test your cake pans for leaks before pouring the batter.
- Save a small bowl of buttercream aside for patching.
- Don’t rush the carving; pause and plan your slice angle.
 Save to Pinterest
 May your graduation cake sparkle as brightly as the occasion itself. Make memories with every slice—this showstopper is always worth the effort.
Recipe FAQs
- → What gives the cake its geode appearance?
The geode effect is created by carving a wedge into the cake, filling it with colored sugar crystals, and painting gold edges for depth and shine.
- → Can I use other colors for the geode?
Yes, you can blend teal and blue food coloring for variation or choose your preferred shades for custom designs.
- → How do you keep cake layers moist?
Brushing the layers with simple syrup before stacking helps maintain moisture in every slice.
- → Is this cake suitable for vegetarians?
Yes, the cake is made with vegetarian-friendly ingredients. Always check labels for additives in sugar or coloring.
- → What tools are essential for decoration?
You'll need an electric mixer, offset spatula, serrated knife, parchment paper, and a food-safe paintbrush for gold accents and assembly.
- → Can I add other flavors?
Lemon or almond extract can be added to the vanilla cake base for extra flavor variation.