 Save to Pinterest
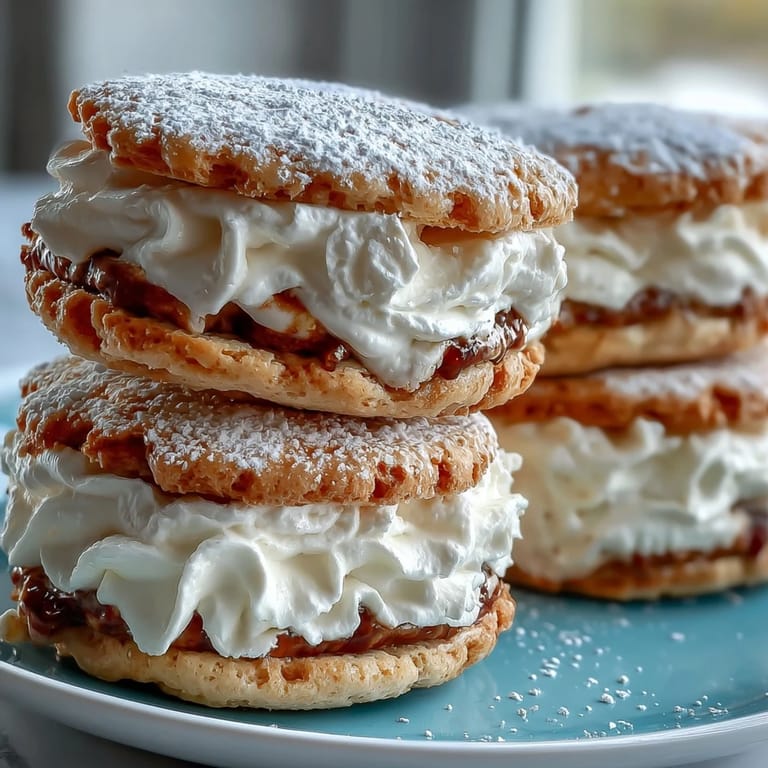
 I stumbled upon Milk Cookies while scrolling through fan art of Cookie Run Kingdom one late afternoon, and something about those delicate sandwich cookies with their creamy centers had me instantly curious. My friend mentioned she'd been craving something sweet but not too heavy, and this seemed like the perfect excuse to experiment in the kitchen. The recipe looked deceptively simple, which I've learned usually means the magic is in the technique, not the ingredients. Within an hour, I had golden cookies cooling on the counter and was already imagining how they'd taste with that smooth vanilla filling.
I made these for my coworkers the following week, and watching their faces light up when they bit into one was worth every minute of prep. One person actually closed their eyes while eating, which I'm taking as the ultimate compliment. They disappeared so fast I barely got to photograph them, and suddenly I was getting requests for the recipe from people I barely knew. That's when I realized these weren't just cookies—they were the kind of thing that makes people remember who made them for them.
Ingredients
- All-purpose flour (2 cups): This is your foundation, and I've learned that spooning and leveling instead of scooping directly from the bag prevents packing down the flour, which would make dense cookies.
- Unsalted butter (1/2 cup for dough, 1/4 cup for filling): Room temperature is non-negotiable here—cold butter won't cream properly, and you'll end up with a gritty texture instead of that light, tender crumb.
- Granulated sugar (2/3 cup): This sweetens the cookie and helps create that delicate structure when creamed with butter.
- Large egg: Binds everything together and adds just enough moisture to make the dough workable without being sticky.
- Milk (2 tbsp for dough, 1 tbsp for filling): A small amount keeps these cookies tender and gives them that signature soft texture that makes them memorable.
- Vanilla extract (1 tsp for dough, 1 tsp for filling): Don't skip or skimp on this—it's the flavor backbone that makes people go back for a second cookie.
- Baking powder (1/2 tsp): Just enough lift to make the cookies light without making them cake-like.
- Salt (1/4 tsp): A tiny pinch that you barely notice but absolutely matters for bringing out all the other flavors.
- Powdered sugar (1 cup for filling): Sift this before using, because lumps in your cream filling will ruin the smooth texture you're going for.
Tired of Takeout? 🥡
Get 10 meals you can make faster than delivery arrives. Seriously.
One email. No spam. Unsubscribe anytime.
Instructions
- Get Everything Ready:
- Preheat your oven to 350°F and line your baking sheets with parchment paper—this prevents sticking and gives you a clean kitchen moment before things get busy. Having everything measured out before you start mixing (the fancy bakers call this mise en place) means you won't be scrambling halfway through.
- Mix the Dry Stuff:
- In one bowl, whisk together your flour, baking powder, and salt so they're evenly distributed throughout. This takes maybe a minute but makes a real difference in how evenly your cookies bake.
- Cream the Butter and Sugar:
- In your large mixing bowl, beat soft butter with sugar for about 2-3 minutes until it's pale and fluffy—you're aerating the butter, which creates lift. If you're doing this by hand, your arm will get a workout, but lean into it.
- Add the Wet Ingredients:
- Beat in your egg, milk, and vanilla until everything looks smooth and combined, about another minute. Don't overmix once you add the wet stuff, or you'll develop gluten and end up with tougher cookies.
- Bring It Together:
- Gradually add your dry ingredients to the wet mixture, stirring gently until you have a soft dough that just barely comes together. Stop mixing the moment you see no white streaks of flour—overworking is the enemy here.
- Shape and Flatten:
- Roll the dough into 1-inch balls and place them about 2 inches apart on your prepared sheets, then gently flatten each one with your palm or the bottom of a glass until they're about 1/4-inch thick. The flattening is important because it helps them cook evenly and gives you a nice flat surface for the filling later.
- Bake Until Golden:
- Bake for 10-12 minutes, watching carefully—you want the edges to just turn golden but the centers to still look slightly underdone and pale. They'll continue cooking on the hot pan after you pull them out.
- Cool Completely:
- Let them sit on the baking sheet for 5 minutes, then transfer to a wire rack and let them cool all the way down. This matters because warm cookies are fragile and will crack when you try to fill them.
- Make the Cream Filling:
- Beat your softened butter until it's smooth and creamy, then gradually add your sifted powdered sugar a bit at a time, alternating with the milk and vanilla. The gradual approach prevents lumps and gives you a silky filling that pipes beautifully.
- Assemble the Sandwiches:
- Spread or pipe about 1 tablespoon of filling onto the flat side of half your cooled cookies, then top with another cookie, flat side down. Press gently together so the filling spreads evenly to the edges.
 Save to Pinterest
 I realized these cookies became something I made whenever I wanted to say thank you without words—for the neighbor who helped with a project, for my mom's patience during a stressful week, for my friend who listened without judgment. There's something about the act of baking them, watching them transform from simple dough to golden delicate rounds, that feels like care taking physical form. Every time someone bit into one, I saw that moment of surprise and pleasure, and that's when I knew I'd found something worth repeating.
The Science of Tender Cookies
What makes these cookies so delicate instead of cakey or tough comes down to the ratio of butter to flour and the minimal mixing involved. I learned this the hard way when I accidentally overmixed a batch thinking more stirring meant better results—they turned out dense and tough. Now I know that creaming the butter and sugar aerates the dough just enough, and stopping the mixer as soon as the dry ingredients disappear prevents developing the gluten that makes cookies chewy instead of tender. The small amount of milk keeps them soft as they cool, which is why skipping it makes them crumbly.
Why the Filling Matters
The cream filling isn't just decoration—it's what elevates these from plain butter cookies to something memorable and special. When I first made a batch and skipped the filling to taste the cookies alone, they were good but somehow incomplete, like a story without an ending. The vanilla cream adds richness and a soft contrast to the cookie's delicate crumb, and when both parts work together, it's suddenly dessert you actually crave instead of just something sweet to end a meal. I've noticed that people always eat at least two because the first one leaves them wanting the exact experience again.
Making Them Your Own
The beauty of this recipe is that the base is forgiving enough to play with, but structured enough that your experiments usually turn out. I've made a chocolate version by replacing 2 tablespoons of flour with cocoa powder, and I've had fun decorating the edges with sprinkles before baking so they stick perfectly. The filling is where you can really let your creativity loose—try almond extract instead of vanilla, add a bit of lemon zest, or even make a brown butter version if you're feeling adventurous. What matters most is that these are cookies made with your own hands, which means they're automatically better than anything you could buy.
- Store them in an airtight container at room temperature for up to 3 days, or freeze the unfilled cookies for up to a month if you want to assemble them fresh later.
- If your filling gets too soft, pop it in the fridge for 10-15 minutes before assembling, and the cookies will hold together perfectly.
- These make incredible gifts when you stack them in a box with parchment paper between each layer, and people genuinely treasure something homemade in a way they never treasure store-bought sweets.
 Save to Pinterest
 These Milk Cookie sandwiches have become my go-to when I need to show someone they matter, and I hope they become the same for you. There's real magic in baking something this delicate and watching it turn into something that makes people smile.
Recipe FAQs
- → What ingredients create the soft texture in these cookies?
The combination of softened butter, milk, and vanilla extract with flour results in a tender, soft cookie texture.
- → How is the cream filling made smooth and fluffy?
By beating softened butter with sifted powdered sugar, milk, and vanilla until the mixture becomes light and airy.
- → Can these cookie sandwiches be stored for later consumption?
Yes, they should be kept in an airtight container and remain fresh for up to three days.
- → What baking temperature and time are used?
The cookies are baked at 350°F (175°C) for about 10 to 12 minutes until the edges turn golden.
- → Are there variations to enhance flavor?
Adding cocoa powder to the dough for a chocolate twist or decorating edges with sprinkles can add variety and visual appeal.